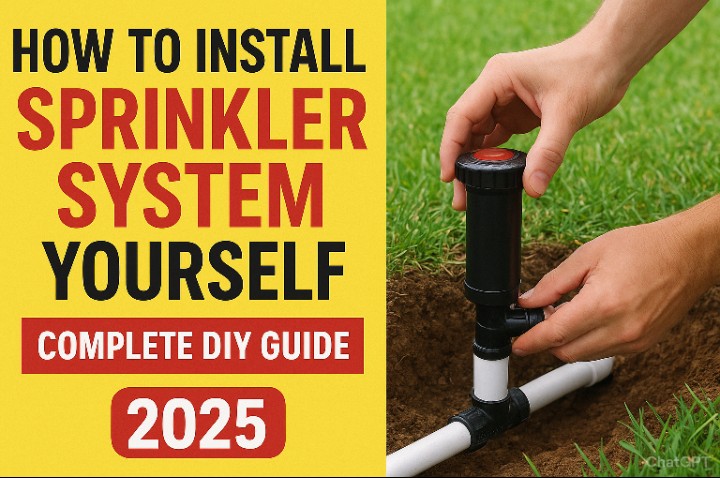
Want to install your own irrigation system? You are making a smart choice. DIY sprinkler installation saves homeowners $2,000-$4,000 compared to professional services.
This step-by-step guide walks you through everything needed for successful automatic sprinkler system installation.
Installing a DIY sprinkler system takes 2-3 weeks and costs $1,500-$2,000 in materials. You will need proper planning, quality components, and basic tools. Most homeowners can complete this project with patience and attention to detail.
Why Install Your Own Sprinkler System?
Many homeowners wonder if they can install their own sprinkler system. The answer is absolutely yes.
Professional installation averages $3,049-$5,118 for quarter-acre properties. DIY costs just $1,500-$2,000. You decide sprinkler placement, zone coverage, and timing schedules. Understanding your irrigation system helps with future maintenance and repairs.
Automatic sprinkler systems add 83% of installation costs to home value. That’s a solid return on your investment.
Pre-Installation Planning: Foundation for Success
How to Measure Your Yard for Sprinklers
Start by mapping your entire property accurately. Property size directly impacts material costs and zone requirements. Walk your yard with a measuring tape and sketch all features.
Include house footprint and dimensions, trees, shrubs, and landscaped areas. Don’t forget driveways, walkways, patios, slopes, hills, and drainage patterns. Mark existing water sources and electrical outlets too.
Use your smartphone’s measurement apps for quick estimates. Then verify with tape measures for accuracy.
Water Pressure Testing for Sprinkler Systems
Proper water pressure ensures optimal sprinkler performance. Here’s how to test it properly.
Attach a pressure gauge to your outdoor faucet. Turn off all indoor water use first. Record pressure at different times throughout the day.
Spray heads work best at 25-35 PSI. Rotary nozzles need 35-50 PSI. Impact sprinklers operate well at 30-70 PSI.
Low pressure below 25 PSI requires pressure-compensating nozzles. High pressure above 70 PSI needs pressure regulators.
Calculating Flow Rate for Your System
Flow rate determines how many sprinklers can run simultaneously. Use this simple test to find yours.
Fill a 5-gallon bucket from your outdoor spigot. Time how long it takes. Divide 5 by the time in minutes for your GPM rate.
If filling takes 2.5 minutes, your flow rate is 2 GPM. Small spray heads need 1-3 GPM each. Medium rotary nozzles require 2-4 GPM each. Large impact sprinklers use 4-8 GPM each.
DIY Sprinkler System Cost Breakdown
Materials and Equipment Costs
Let’s talk real numbers here. PVC pipes and fittings cost $300-$500 total. You will pay $0.50-$0.75 per foot for 3/4″ PVC pipe. The 1″ PVC pipe runs $0.75-$1.00 per foot. Elbows, tees, and couplings cost $1-$5 each.
Sprinkler heads range from $200-$400 depending on your choices. Pop-up spray heads cost $3-$15 each. Rotary sprinklers run $7-$25 each. Impact sprinklers cost $10-$40 each.
Control components add up to $400-$600. Zone valves cost $25-$50 each. Timer controllers range from $50-$200. Backflow preventers cost $75-$150. Wire and connectors add another $50-$100.
Tools and permits can cost $200-$500. A trenching shovel costs $30-$50. Pipe cutters run $15-$25. Installation permits cost $80-$240 in most areas. Trencher rental adds $150-$250 per day if needed.
Regional Cost Variations
Costs vary by location due to local regulations and climate requirements.
Western states like California, Nevada, and Arizona have higher permit costs. Expect $150-$300 due to water restrictions there. Northern states including Minnesota, Wisconsin, and Michigan need additional winterization equipment. This adds $200-$400 to your total cost.
Southern states such as Texas, Florida, and Georgia require rain sensors. These add $100-$200 to your project. Northeastern states like New York, Massachusetts, and Connecticut have rocky soil. You might need equipment rental there.
Sprinkler Zone Planning and Design
How Many Zones Do You Need?
Zone requirements depend on yard size and plant types. Quarter-acre properties typically need 4-6 zones. Half-acre properties require 6-10 zones. Full-acre properties need 10-15 zones.
Irrigation Zone Types
Think about different plant water needs when planning zones.
Turf zones cover grass areas with similar sun exposure. Shrub zones handle trees, bushes, and landscaped beds. Garden zones water vegetable gardens and annual flowers. Specialty zones cover slopes, narrow strips, or unique areas.
Plan separate zones for different plant water needs. Shade areas need less water than full-sun locations.
Head-to-Head Coverage Planning
Proper sprinkler spacing prevents dry spots and overwatering. Follow these spacing guidelines for best results.
Space spray heads 12-15 feet apart maximum. Rotary nozzles should be 18-25 feet apart maximum. Impact sprinklers work best 25-40 feet apart maximum.
Each sprinkler’s spray pattern should reach neighboring sprinklers. This overlap ensures complete coverage without gaps.
Best Sprinkler System Components
Choosing Irrigation Pipes
PVC pipes work best in most climates. They are strong, rigid, and perfect for warm areas. Use larger diameter pipes from 3/4″ to 1 1/4″ to improve pressure. Schedule 40 thickness is recommended for durability.
PVC pipes are easy to cut, fit, and repair when needed.
Polyethylene pipes work as a cold climate alternative. They are flexible and freeze-resistant. However, they are harder to repair than PVC. Rain Bird doesn’t recommend poly for main lines.
Top Sprinkler Brands
Rain Bird leads the industry with reliable components. They make excellent spray heads and rotary nozzles. Their professional-grade valves and timers last for years. You will find wide availability and parts support everywhere.
Toro offers quality residential systems with durable pop-up sprinklers. Their controllers are user-friendly with good warranty coverage. Hunter provides commercial-grade reliability with long-lasting gear-driven sprinklers. They make advanced smart controllers that professional installers prefer.
Avoid Orbit and generic hardware store brands. These often fail within 2-3 years.
Sprinkler Head Selection Guide
Use spray heads for small areas under 15 feet radius. They work perfectly in flower beds and tight spaces. Choose them for areas requiring precise water placement.
Rotary nozzles handle medium areas from 15-30 feet radius. They are ideal for sloped terrain with slower application rates. These work great for water-efficient applications too.
Impact sprinklers cover large open areas over 30 feet radius. They are built for agricultural or commercial applications. Use them in areas with tall grass or crops.
Step-by-Step Installation Process
Week 1: Layout and Permits
Call 811 for utility marking on days 1-2. This free service locates underground utilities and is required by law in all states. The process usually takes 2-3 business days to complete.
Apply for permits on days 3-4. Check your local building department requirements first. Most areas require permits for irrigation systems connecting to potable water.
Mark sprinkler locations on days 5-7. Place stakes at each planned sprinkler location from your design. Use spray paint to mark pipe routes clearly.
Week 2: Trenching and Pipe Installation
Trenching depth requirements vary by climate. Use 6 inches minimum in warm climates. Cold climates need 8-12 inches depth. Northern regions require pipes below frost line.
Rent a power trencher for large projects to save time and effort. Hand-dig near utilities and structures for safety. Maintain consistent depth for proper drainage throughout your system.
Apply primer to pipe and fitting surfaces for PVC installation. Add PVC cement to fitting interior and pipe exterior. Insert fully and twist quarter-turn, then hold 15 seconds for proper bond.
Week 3: System Assembly and Testing
Mount your backflow preventer above ground level on a concrete pad. Connect to main water line with shut-off valve included. Most areas require professional inspection of this connection.
Space valves 6-12 inches apart for maintenance access during manifold assembly. Install in valve box below ground level. Connect to controller wiring according to instructions.
Open each valve manually before installing sprinkler heads for system flushing. Run water 2-3 minutes per zone to remove installation debris. This prevents clogged nozzles later.
Thread heads onto swing joints or risers for sprinkler installation. Adjust height flush with soil level. Install only after complete system flush.
Testing Your Irrigation System
Catch Cup Test Method
This professional technique measures water distribution uniformity accurately.
Place identical containers throughout each zone in a grid pattern. Run sprinklers for normal cycle time and measure collected water. Good coverage shows less than 20% variation between containers. Poor coverage indicates more than 30% variation and signals problems.
Pressure Testing Each Zone
Check operating pressure at multiple sprinkler locations in each zone.
Spray heads should operate at 25-35 PSI for best performance. Rotary nozzles need 35-50 PSI to work properly. Impact sprinklers require 30-70 PSI for optimal coverage.
Install pressure regulators if pressure exceeds manufacturer recommendations.
Coverage Pattern Adjustments
Fix dry spots by adjusting spray direction and distance settings. Replace with higher-flow nozzles if needed. Add additional sprinkler heads for complete coverage.
Fix overwatered areas by reducing spray distance settings. Install lower-flow nozzles to reduce output. Adjust timer run times based on actual coverage needs.
Seasonal Sprinkler Maintenance
Spring System Startup
March and April bring system activation time. Turn on main water supply slowly to prevent damage. Check for winter damage or leaks throughout the system.
Clean debris from sprinkler heads after winter. Test each zone for proper operation before regular use. Adjust spray patterns after ground settling from freeze-thaw cycles.
Summer System Optimization
June through August requires weekly monitoring for clogged nozzles. Adjust watering times for heat stress periods. Check for leaks during peak usage times when pressure drops occur.
Verify timer programming accuracy throughout the growing season.
Fall Winterization Preparation
September through November means preparing for winter shutdown. Clean leaves from sprinkler heads regularly during fall. Inspect system for needed repairs before cold weather arrives.
Schedule professional blowout service in cold climates. Adjust watering schedules for cooler temperatures and reduced plant needs.
Winter System Protection
December through February focuses on protecting your investment. Shut off main water supply to prevent freeze damage. Drain all water from pipes and valves completely.
Insulate above-ground components in cold regions. Store removable controllers indoors during freezing months.
Professional air-pressure system drainage costs $75-$150. This service prevents thousands in freeze damage repairs.
Smart Irrigation Technology
WiFi Smart Controllers
Modern smart controllers optimize watering automatically using weather data.
The Rachio 3 costs $199-$249 and includes weather-based scheduling. Smartphone app control makes adjustments easy anywhere. It’s EPA WaterSense certified for efficiency.
Rain Bird ST8I runs $179-$229 with integrated WiFi connectivity. Rain and freeze sensors prevent waste. Professional-grade reliability ensures years of service.
Hunter Hydrawise costs $189-$239 with predictive watering technology. Detailed water usage reports help track savings. Multiple platform compatibility works with any smartphone.
Water Conservation Sensors
Rain sensors cost $50-$150 and automatically skip watering during rainfall. Florida, Texas, California, and other water-conscious states require them by law.
Soil moisture sensors run $100-$200 and measure actual soil moisture levels. They prevent overwatering and underwatering automatically based on real conditions.
Flow sensors cost $150-$300 and detect leaks and broken pipes immediately. They send alerts to smartphone apps for quick response.
Common Installation Problems and Solutions
Low Water Pressure Issues
Weak spray patterns, poor coverage, and sprinklers not popping up indicate pressure problems.
Check for leaks throughout your entire system first. Verify main valve is fully open and not partially closed. Install a pressure booster pump costing $300-$600 if needed. Use pressure-compensating nozzles as an alternative solution.
Uneven Water Coverage
Brown spots in lawn, overwatered areas, and patchy growth show coverage issues.
Perform catch cup test to identify specific problem areas. Adjust sprinkler head spacing or change types as needed. Clean clogged nozzles regularly during growing season. Check and adjust water pressure to manufacturer specifications.
Timer and Electrical Problems
Zones not turning on, random operation, and display issues indicate electrical troubles.
Check wire connections at valves for loose or corroded contacts. Test transformer voltage output with multimeter. Verify correct wire gauge usage throughout system. Replace damaged valve solenoids when needed.
Pipe Leaks and Breaks
Wet spots, reduced pressure, and high water bills suggest pipe problems.
Use pipe locator to find exact break location quickly. Cut out damaged section cleanly with proper tools. Install repair coupling or new pipe section as needed. Test repair under full pressure before backfilling.
Legal Requirements and Permits
Building Permits by State
California requires permits for all irrigation systems over $500 value. Texas needs permits for systems connecting to potable water supplies. Florida requires permits for automatic systems with backflow preventers. New York mandates permits for all permanent irrigation installations.
Permit costs typically range from $50-$300 depending on your location.
Backflow Prevention Requirements
Pressure vacuum breakers cost $75-$125 for basic protection. Reduced pressure zones run $200-$400 for high-hazard applications. Double check valves cost $100-$200 for moderate protection levels.
Many areas require professional backflow testing annually. This service costs $75-$150 but ensures safety compliance.
Water Use Restrictions
Common restrictions include odd/even day watering schedules in drought areas. Time-of-day watering windows prevent peak usage conflicts. Seasonal watering bans occur during extreme drought conditions. Smart controller requirements help enforce conservation automatically.
Check local water utility regulations before starting installation.
Professional vs DIY Installation
When to Hire Professionals
Consider professional installation for complex electrical work including main panel connections. Rocky or difficult soil may require specialized trenching equipment you can’t rent easily.
Large properties over 1 acre typically need commercial equipment and expertise. Some areas require licensed contractor installation due to strict local codes.
DIY Installation Advantages
Cost savings of $2,000-$4,000 less than professional installation make DIY attractive. Timeline control lets you work at your own pace and schedule. System knowledge helps you understand maintenance and repairs better. Customization allows changes during installation easily.
Hybrid Approach Benefits
Many homeowners use this successful strategy combining DIY and professional work.
Handle planning, trenching, pipe installation, and head placement yourself. Hire professionals for main line connection, electrical work, permits, and final inspection.
This approach saves money while ensuring code compliance and safety.
Irrigation System ROI and Value
Home Value Impact
Property value increases 5-15% for well-designed irrigation systems. Automatic irrigation appeals to buyers during home sales. Green, healthy lawns attract attention and create curb appeal. Maintenance reduction means less manual watering labor for new owners.
Long-term Cost Savings
Smart controllers reduce water usage 20-30% through efficient scheduling. Proper watering prevents costly re-sodding of damaged lawns. Automated watering frees up weekend time for other activities. Some insurance policies offer discounts for fire-suppressive landscaping features.
Payback Timeline
Initial investment runs $1,500-$2,000 for DIY installation materials. Annual water savings reach $200-$400 with efficient watering practices. Maintenance costs average $100-$200 annually for upkeep. Break-even point typically occurs within 3-5 years.
Frequently Asked Questions
Can I install sprinklers myself?
Most homeowners can successfully install irrigation systems with basic tools and attention to detail. The project takes 2-3 weeks of part-time work. Complex electrical or plumbing connections may require professional help for safety and code compliance.
How deep should sprinkler pipes be buried?
Minimum 6 inches in warm climates protects pipes from damage. Cold regions need 8-12 inches depth for freeze protection. Northern states require pipes below frost line to prevent winter damage.
What permits do I need for sprinkler installation?
Most areas require building permits for automatic irrigation systems connecting to water supplies. Costs range from $50-$300 depending on location. Contact your local building department for specific requirements and applications.
How much does DIY sprinkler installation cost?
Typical costs are $1,500-$2,000 for quarter-acre properties including materials, permits, and tools. Professional installation costs $3,000-$5,000 for comparison. Savings of $2,000-$4,000 make DIY attractive for many homeowners.
When should I winterize my sprinkler system?
Winterize before first hard freeze in your area to prevent damage. Northern states typically winterize in October or November. Southern states may only need winterization during unusual cold snaps.
How often should I service my irrigation system?
Perform basic maintenance monthly during growing season for optimal performance. Schedule professional service annually for thorough inspection. Replace worn components every 5-10 years depending on usage and local water quality.
Conclusion: Your Path to Perfect Lawn Irrigation
Installing your own sprinkler system delivers significant savings and complete control over lawn health. Proper planning, quality components, and attention to detail help most homeowners achieve professional-quality results.
Detailed planning prevents costly mistakes that cause problems later. Quality components last longer and work better than cheap alternatives. Proper installation depth protects your investment from damage. Regular maintenance keeps systems running efficiently for years.
Start with accurate measurements and realistic budgeting for your project. Choose proven brands like Rain Bird, Toro, or Hunter for reliability. Take time with installation since rushing leads to problems later.
Your lawn will reward careful installation with years of healthy, green growth. You will enjoy the satisfaction of completing this valuable DIY project. Plus you will save thousands compared to professional installation costs.
Begin with yard measurements and water pressure testing when you are ready to start. Then create your zone plan and shopping list for materials. Your perfect lawn irrigation system is just 2-3 weeks away with proper planning.


