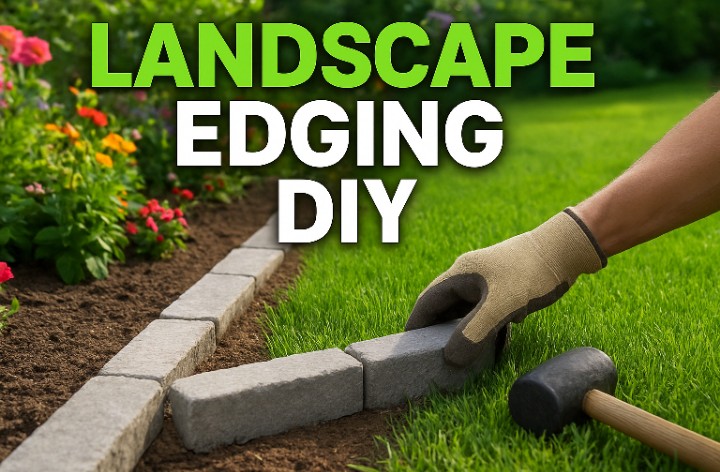
Installing landscape edging needs a 4-6 inch trench. Place your chosen material with half the height underground. Secure with stakes every 2-3 feet and backfill both sides. Proper depth and alignment create long-lasting, professional borders.
What is Landscape Edging and Why You Need It?
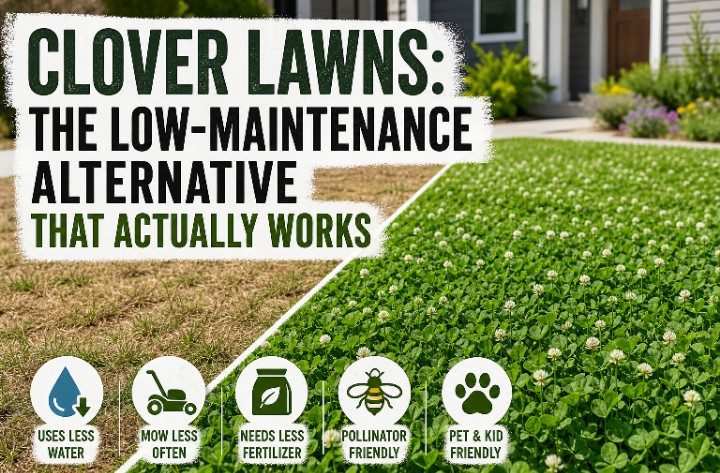
Landscape edging creates clear borders between yard areas. It separates flower beds from lawn and defines walkways. Plus, it contains mulch perfectly.
Professional landscapers charge $3-8 per linear foot. DIY installation costs just $1-3 per foot. This saves homeowners hundreds on typical projects.
Types of Landscape Edging Materials
Most Popular Choice: Plastic edging ($0.50-2 per foot)
– Flexible for curves
– Easy installation
– 10-15 year lifespan
Professional Grade: Metal edging ($2-5 per foot)
– Clean, precise lines
– 20+ year durability
– Rust-resistant options available
Natural Look: Stone/brick edging ($3-8 per foot)
– Permanent installation
– Increases property value
– Complements traditional architecture
Step 1: Planning Your Landscape Edging Project
How to Design Effective Garden Borders
For curved flower beds: Use a garden hose to create natural-flowing lines. Sharp curves collect debris and are tough to mow around.
For straight pathways: Measure twice, cut once. Use stakes and string line for perfectly straight borders. They should complement your home’s style.
Exlandscaper’s Tip: Walk through your yard at different times of day. See how shadows and lighting affect your proposed design.
Measuring and Calculating Materials
Formula for materials needed:
– Measure total linear feet
– Add 10% for waste/cuts
– Stakes needed: Every 2-3 feet = Total feet ÷ 2.5
Example: 100-foot border needs 110 feet of edging plus 40 stakes.
Step 2: Essential Tools and Materials for DIY Installation
Must-Have Tools Checklist
✅ Trenching spade – Creates clean cuts
✅ Rubber mallet – Prevents material damage
✅ Level – Ensures professional appearance
✅ String line – Maintains straight alignment
✅ Hand tamper – Compacts soil properly
✅ Safety glasses and gloves – Protects during installation
Shopping List by Edging Type
For Plastic Edging Projects:
– Edging strips (measure total feet needed)
– Galvanized landscape spikes (8-10 inches)
– Coarse sand (1 cubic yard per 100 feet)
For Metal Edging Projects:
– Steel or aluminum edging sections
– Connecting brackets
– Heavy-duty stakes
– Level for precision installation
For Stone/Brick Projects:
– Individual stones or bricks
– Masonry sand (2-3 inches base depth)
– Landscape adhesive (optional)
– Rubber mallet and wooden block
Step 3: How to Dig the Perfect Trench
Trench Dimensions That Prevent Future Problems
Width: 4-6 inches (allows working room)
Depth: Minimum half the edging height underground
– Plastic edging: 3-4 inches deep
– Metal edging: 4-5 inches deep
– Stone borders: 4-6 inches deep
Soil Preparation Techniques
Remove completely: Grass, weeds, roots, and rocks larger than 1 inch.
For clay soil: Add coarse sand to improve drainage.
For sandy soil: Add organic compost for stability.
For rocky areas: Use a mattock to break through tough spots.
Common Mistake to Avoid: Shallow trenches cause shifting. They require costly repairs within 2-3 years.
Step 4: Installation Methods by Material Type
Installing Plastic Landscape Edging
Step-by-step process:
1. Warm the material: Leave plastic edging in sunlight for easier bending.
2. Position correctly: V-flange faces the garden bed to prevent grass intrusion.
3. Secure properly: Drive stakes through mounting holes every 2-3 feet.
4. Check alignment: Use string line to maintain consistent height.
For curves: Make small relief cuts on the back side. This prevents kinking.
Installing Metal Landscape Edging
Professional installation technique:
1. Work in sections: Install 3-4 foot pieces for easier handling.
2. Use rubber mallet: Tap gently to avoid denting.
3. Connect sections: Use manufacturer’s brackets for seamless joints.
4. Check for level: Metal shows irregularities more than other materials.
Maintenance advantage: Metal edging needs minimal upkeep. It maintains sharp lines for decades.
Installing Stone and Brick Borders
Foundation requirements:
1. Prepare sand base: 1-2 inches of coarse sand, leveled and compacted.
2. Set first piece: Start at most visible corner for best results.
3. Maintain level: Check each piece individually and in relation to neighbors.
4. Fill joints: Use sand for informal look, mortar for permanent installation.
Design tip: Vary stone sizes slightly for natural appearance. Keep consistent top height though.
Step 5: Backfilling and Finishing Techniques
Proper Backfilling Prevents Settlement
Layer-by-layer method:
1. Add soil in 2-3 inch lifts
2. Compact each layer with hand tamper
3. Backfill both sides simultaneously to prevent shifting
4. Water lightly to settle soil
Final height: Leave ½ to ¾ inch of edging visible above ground level.
Professional Finishing Touches
Grade soil properly: Slope away from edging toward lawn/bed center.
Clean visible surfaces: Remove soil and debris from edging face.
Water thoroughly: This helps eliminate air pockets and shows settlement areas.
Common Installation Mistakes and How to Avoid Them
Top 5 DIY Edging Failures
1. Trench too shallow → Edging shifts within 1-2 seasons
2. Insufficient stakes → Gaps develop between sections
3. Wrong flange direction → Grass grows over plastic edging
4. Poor soil compaction → Settlement creates uneven borders
5. Ignoring drainage → Frost heaving damages installation
Professional Solutions
Use the “half-height rule”: Always bury at least 50% of edging height.
Stake every 30 inches maximum: More stakes equal longer-lasting installation.
Compact in layers: Never backfill entire trench at once.
Consider climate: Add extra depth in freeze-thaw regions like Colorado or Montana.
Maintenance Schedule for Long-Lasting Results
Annual Inspection Checklist (Spring)
– Check for loose or missing stakes
– Look for sections that have shifted or settled
– Inspect for grass/weed intrusion
– Clean debris from edging face
– Re-level any uneven sections
5-Year Maintenance Tasks
– Replace worn plastic edging sections
– Re-point mortar joints in stone installations
– Add additional stakes where needed
– Refresh mulch in adjacent beds
Protection Tips for Homeowners
Lawn care protection: Mark edging locations for lawn service crews.
Winter prep: Remove ice and snow buildup that can cause shifting.
Equipment awareness: Train family members to avoid hitting edges with trimmers.
Advanced Installation Techniques
Creating Perfect Corners and Curves
90-degree corners: Use 3-4-5 triangle method
– Measure 3 feet along one side
– Measure 4 feet along perpendicular side
– Diagonal should measure exactly 5 feet
Gentle curves: Test with garden hose before digging.
Avoid sharp angles: They are difficult to maintain and collect debris.
Specialized Applications
Paver edging systems: Need compacted gravel base plus leveling sand.
Concrete borders: Can be poured-in-place or use prefab blocks.
Raised bed edging: Needs deeper installation for soil retention.
Cost Analysis: DIY vs Professional Installation
Average Project Costs (100 linear feet)
DIY Installation:
– Plastic edging: $150-250 total cost
– Metal edging: $300-450 total cost
– Stone edging: $400-600 total cost
Professional Installation:
– Labor costs: $300-800 additional
– Total savings: 40-60% with DIY approach
Return on Investment
Properly installed landscape edging increases curb appeal. It can add $500-1500 to home value. This makes it one of the highest-ROI landscaping improvements.
Regional Considerations for Western Homeowners
Climate-Specific Installation Tips
Pacific Northwest: Use rust-resistant materials due to high moisture.
Southwest Deserts: Deep installation prevents heat expansion issues.
Mountain Regions: Extra depth prevents frost heaving damage.
Coastal Areas: Choose corrosion-resistant materials for salt air exposure.
Local Material Sourcing
Most Western home improvement stores stock appropriate materials for regional conditions. Home Depot, Lowe’s, and local nurseries carry what you need. Ask about freeze-thaw ratings and UV resistance for your specific zip code.
Troubleshooting Common Problems
Problem: Edging keeps shifting
Solution: Increase stake frequency and check trench depth.
Problem: Grass growing over plastic edging
Solution: Make sure V-flange faces bed side and increase visible height.
Problem: Uneven appearance after settlement
Solution: Add soil gradually and re-level affected sections.
Problem: Frost damage in winter
Solution: Make sure there’s proper drainage and adequate burial depth.
Frequently Asked Questions About Landscape Edging
Q: How deep should landscape edging be installed?
A: Minimum 3-4 inches deep. At least half the edging height should be underground for stability.
Q: What’s the best material for curved flower beds?
A: Flexible plastic or rubber edging works best for curves. Metal suits straight lines better.
Q: How often does landscape edging need replacement?
A: Plastic lasts 10-15 years, metal 20+ years. Stone is permanent with proper installation.
Q: Can I install edging in winter?
A: Avoid frozen ground conditions. Spring and fall offer ideal soil conditions for installation.
Q: Do I need professional help for stone edging?
A: DIY is possible with proper tools and patience. Consider professionals for complex curves or large projects.
Conclusion: Achieving Professional Landscape Edging Results
Installing landscape edging transforms ordinary yards into professionally designed outdoor spaces. It provides practical benefits like mulch containment and easier lawn maintenance.
With proper planning, quality materials, and attention to installation details, DIY homeowners can achieve results that rival professional installations. Plus, you’ll save significant money.
Key success factors:
– Proper trench depth and width
– Adequate staking every 2-3 feet
– Layer-by-layer backfilling and compaction
– Regular maintenance and inspection
Remember: Take time during planning and installation phases. This ensures long-lasting results. Well-installed landscape edging becomes a permanent asset. It enhances your property’s appearance and value for decades.
Ready to start your project? Measure your borders, choose your materials, and follow this guide. You will get professional-quality results that will make your neighbors ask, “Who did your landscaping?”