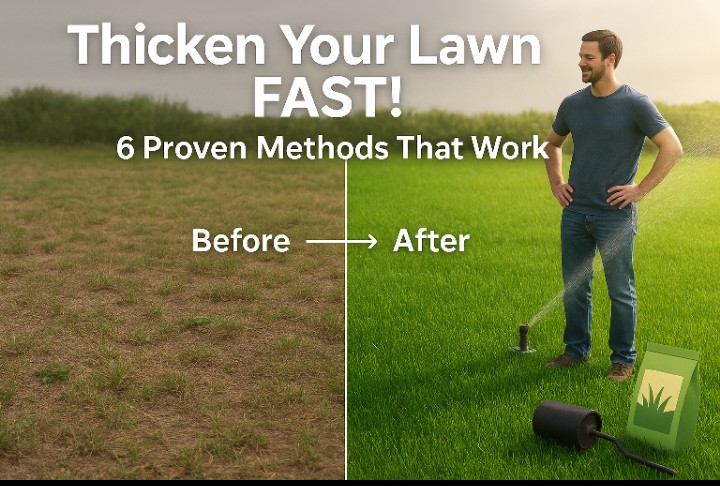
Want a thick, healthy lawn? You are in the right place. These six methods are backed by research and proven results. No magic products. Just solid techniques that deliver.
Method 1: Core Aeration (Start Here)
Core aeration might be the best thing you can do. It’s that important.
What happens during aeration:
A machine pulls out small soil plugs. These plugs are 2-3 inches deep. Your lawn gets thousands of tiny holes. This breaks up compacted dirt instantly.
Why your grass loves it:
Compacted soil suffocates roots. They can’t breathe or grow properly. Aeration fixes this problem fast.
Oxygen reaches the root zone. Water penetrates deeper than before. Nutrients actually get where they’re needed.
Root systems grow stronger and deeper. Seeds drop into holes for perfect germination. Your grass becomes naturally resilient.
Timing matters a lot:
Cool-season varieties like fescue need fall aeration. September through October works best. Spring is your backup option.
Warm-season types prefer late spring. Think late May into June. Soil temperature drives this timing.
Always check soil moisture first. You want damp ground, not soggy. Not bone dry either.
This is the process:
Water your lawn two days ahead. Rent a core aerator for $70-85. Most equipment rental places stock them.
Make multiple passes across your property. Change directions each time you go. Leave those soil plugs right where they fall.
They break down naturally within weeks. Then overseed immediately while holes are fresh.
Extra tip for tough lawns:
Heavily compacted areas need two rounds. Go perpendicular on the second pass. This doubles your hole count.
Budget breakdown:
DIY costs $70-85 for rental. Professional service runs $110-190. Either way, it’s money well spent.
Method 2: Overseeding (Fill the Gaps)
Overseeding adds new grass plants everywhere. Bare spots disappear. Thin areas get thick.
Timing is everything here:
Cool-season grass needs late summer seeding. August through September is prime time. Soil stays warm while air cools down.
Warm-season varieties want May or June. Wait for soil to hit 65-70°F. Miss this window and you will waste money.
Follow these steps:
First, mow really short. Cut down to 1.5-2 inches maximum.
Rake lightly across the area. You want some exposed soil showing.
Pick quality seed carefully. Farm supply stores beat big box retailers. Check the germination rate on every bag. You want 85% minimum.
Look at weed seed percentage too. Lower numbers mean cleaner results.
Match varieties to your conditions. Sun exposure matters. Shade tolerance matters. Traffic levels matter.
Apply seed with a spreader. Go one direction first. Then go perpendicular for your second pass. This ensures even coverage.
Use 2-3 pounds per 1,000 square feet. That’s for overseeding existing lawns.
Make sure seed touches soil. Light raking helps. Some people rent a roller.
Water consistently or fail. Most people mess up right here. Keep the top inch constantly moist.
Water 2-3 times daily. Short sessions of 5-10 minutes each. Continue until you see sprouts.
Choose varieties based on conditions:
Full sun areas do well with perennial ryegrass. Kentucky bluegrass also thrives there. Bermuda works great in warm regions.
Shady spots need fine fescue. Tall fescue handles moderate shade too.
High traffic zones prefer tall fescue. Perennial ryegrass also holds up well.
What to expect:
Germination takes 7-21 days. Grass type determines the speed. Visible thickness appears around week 4-6.
Full establishment needs 8-12 weeks minimum. Plan accordingly.
Best results come from combining methods. Aerate first, then overseed immediately. This combination rarely fails.
Method 3: Smart Fertilization
Grass can not grow thick without proper nutrition. A good feeding program makes all the difference.
Understanding fertilizer numbers:
That N-P-K ratio tells you everything. Nitrogen drives blade growth and color. It’s your thickness ingredient.
Phosphorus builds root systems. Super important during seeding. Potassium fights disease and stress.
Feed on this schedule:
Spring feeding starts when soil warms. Around 55°F soil temperature. Apply moderate nitrogen at 1 pound per 1,000 square feet.
Slow-release formulas work better than quick-release. They feed gradually over weeks.
Fall feeding is most critical. This applies to cool-season varieties. September through October is your window.
Go heavier here—1 to 1.5 pounds nitrogen. This builds root mass and energy reserves. Your spring growth will thank you.
Summer requires restraint. Skip feeding or go very light. Focus on keeping grass alive, not pushing growth.
Starter fertilizer for seeding projects: Look for higher phosphorus numbers. Something like 18-24-12 works great.
Application technique matters:
Calibrate your spreader first. Apply half walking north-south. Apply the other half going east-west.
Water lightly after spreading. This activates the nutrients. Never spread on wet grass blades.
Get a soil test first: Twenty bucks tells you exactly what’s needed. You’ll stop guessing and save money. County extension offices offer cheap testing.
Method 4: Improve Your Soil
Better soil structure means thicker grass. These amendments create lasting improvements.
Gypsum for clay soil:
Clay packs down hard. Gypsum breaks it up chemically. Apply 20-40 pounds per 1,000 square feet.
Timing after aeration works best. Results take 3-6 months to fully develop.
Compost top-dressing:
Spread a quarter-inch layer after aerating. Some people go half an inch. This adds organic matter and beneficial microbes.
Water retention improves dramatically. Soil structure gets better each year. Make it an annual practice.
Lime only when pH drops low:
Get that soil test first. If pH reads below 6.0, lime helps.
Apply 25-50 pounds per 1,000 square feet. Follow your soil test recommendations exactly. Fall application works better than spring.
Changes take 3-6 months to show up.
Sulfur for alkaline soil:
High pH above 7.5 needs correction. Sulfur lowers it gradually. Always follow soil test instructions.
Best strategy overall: Apply any amendment right after aeration. It penetrates deeply this way.
Method 5: Grass Plugs (Quick Fixes)
Plugs are small squares of established grass. They come with roots already growing. Think mini sod pieces.
When plugs make sense:
Summer heat prevents successful seeding. Plugs work in hot weather. Some areas fail repeatedly with seed.
Certain warm-season varieties need plugs. St. Augustine rarely succeeds from seed. Quick results matter sometimes.
Visible improvement shows in 2-4 weeks.
Planting process:
Loosen the top 2-3 inches first. Space plugs 6-12 inches apart. Closer spacing fills in faster.
Press firmly for good soil contact. Water immediately and keep moist. Maintain moisture for 2-3 weeks.
Apply starter fertilizer right away.
Timeline expectations: Spreading and filling takes 4-12 weeks. Grass type and spacing affect speed.
Cost considerations: More expensive than seed, cheaper than sod. Best for medium-sized problem areas.
Method 6: Dethatching (Sometimes Necessary)
Thatch is dead grass between blades and soil. A little is fine—under half an inch. Too much causes problems.
Signs you need dethatching:
Your lawn feels spongy underfoot. Water runs off instead of soaking in. Grass stays thin despite good care.
Check thatch depth by cutting a small wedge. Over half an inch means action time.
When to dethatch:
Cool-season grass needs early fall or spring. Warm-season varieties prefer late spring to early summer.
Only dethatch during active growth periods. Never stress dormant grass.
Dethatching process:
Manual rakes work for small areas. Rent a power dethatcher for larger properties. Most rentals cost $55-75 daily.
Make two passes in different directions. Rake up all debris immediately.
Critical follow-up steps:
Overseed right away. Exposed soil is perfect for germination. Apply starter fertilizer next.
Water consistently for establishment. Avoid foot traffic for 2-3 weeks.
Prevention beats dethatching:
Water deeply but infrequently. Don’t over-fertilize your lawn. Core aerate every year.
Timeline and Real Expectations
- First 2-4 weeks:
Plugs start establishing. Fertilizer creates noticeable greening. Seeds begin sprouting.
- Weeks 4-8:
Overseeded areas fill in nicely. Density improves noticeably. Progress becomes clear.
- Months 3-6:
Major transformation happens. Grass grows thick and dense. Weeds struggle to compete.
Drought tolerance improves naturally.
- After one year:
Thickness becomes sustainable. Each season builds on previous gains. Maintenance gets easier.
Reality check time: No instant miracle exists. Plan on one full growing season. Consistency matters more than perfection.
Budget-Friendly Strategies
DIY versus hiring pros:
Core aeration: $70-85 DIY, $110-190 professional. Overseeding: $160-190 DIY, $310-480 professional.
Split equipment rental with neighbors. Costs drop dramatically.
Smart shopping tactics:
Buy seed bulk at farm suppliers. Prices beat retail stores. Shop end-of-season sales for 25-50% discounts.
Generic fertilizers often match name brands. Compare active ingredients carefully. County extension soil tests cost $12-28.
Highest impact, lowest cost:
Aeration plus overseeding runs $210-240 total. Proper mowing technique costs nothing.
Correct watering habits are free. Leaving clippings provides free fertilizer.
Start small if needed: Renovate the front yard first. Tackle the backyard next season. Spread your investment over time.
Your Action Plan
- Schedule aeration for optimal timing. Cool-season lawns need September. Warm-season lawns need May-June.
- Order quality seed 6-8 weeks ahead.
- Get soil tested for specific needs.
- Execute everything on aeration day. Aerate thoroughly first. Overseed immediately after.
Apply starter fertilizer next. Top-dress with compost. Water consistently afterward.
5. Commit to 8-12 weeks of proper care.
Mistakes to Avoid
Wrong timing kills results. Seeding cool-season grass in summer fails. Temperature matters more than you think.
Cheap seed produces poor results. Quality makes a massive difference.
Insufficient watering after seeding. This is the number one failure point. New seed must stay moist.
Skipping aeration entirely. Seed on compacted soil rarely succeeds.
Giving up too early. Grass establishment takes time. Be patient.
The END
These six methods work because they fix root problems. Aeration relieves compaction. Overseeding adds plant density.
Fertilization provides essential nutrition. Amendments improve soil quality. Plugs fill gaps quickly. Dethatching removes barriers.
Remember these key points:
Aeration is non-negotiable. It’s the most important single step. Combine multiple methods for best results.
Timing determines success or failure. Quality inputs matter significantly. Consistency wins over time.
Expect one full season minimum. Real transformation takes commitment.
Your thick lawn is totally achievable. You have the specific methods now. Schedule that aeration next.
Order quality seed today. Commit to the process fully.
One year from now, you’ll look outside and smile. Your lawn will be completely transformed. Get started this week.